The best e-commerce brands leverage customer intelligence as the foundation of effective customer experiences. Customer lifetime value is one of the most important data points that can be used to tailor experience. Flexible management of customer data through Tealium’s Customer Data Hub makes it possible to build this customer intelligence foundation to directly power customer experience through display ads, email, personalization and more.
I was recently tasked with calculating the lifetime category purchase totals of a user on an eCommerce site using Tealium, a Customer Data Platform (CDP). In this article, we will explore how I was able to achieve a solution using Tealium iQ, the client-side solution, and AudienceStream, the server-side solution.
Please note that the following example will be site-specific and your site is likely to have a different Data Layer configuration. Since I was unable to alter the site’s code base, I had to work with the existing Data Layer extracting what was available. A challenge I was more than willing to accept!
Diving into the Data Layer
The first thing we need to do is jump into the console, enter
utag_dataand see the data that’s available.

For this task, I wanted to get information about the products and their respective categories. Below is a small snippet of the available product data:
product_id: ["421", "404", "419", "410"]
product_list_price: ["210.00", "160.00", "275.00", "75.00"]
product_name: ["Item 1", "Item 2", "Item 3", "Item 4"]
product_original_price: ["210.00", "160.00", "275.00", "75.00"]
product_price: ["210.00", "160.00", "275.00", "75.00"]
product_quantity: ["1", "1", "1", "1"]
product_sku: ["cat1xyz", "cat2xyz", "cat2abc", "cat1abc"]
product_unit_price: ["210.00", "160.00", "275.00", "75.00"]
Since we want to calculate the user’s lifetime purchase category totals, we will need pricing information. For this example, we will be using the
product_priceto retrieve that information. We also need to gather what products belong to which categories. As you can see, there is no array containing the product category, so we will need to see if this information exists elsewhere. Fortunately, it appears that the <preproduct_sku contains this information. We can see that “cat1” and “cat2” are prepended to the sku number. Using this information, we can differentiate between the two categories and calculate their totals.
It should be mentioned that when setting up your Data Layer all arrays should contain the same number of items. That way all indices correlate to the same product. For example, we can determine that in the code above the first product has an ID of 421, costs $210, and has the sku of cat1xyz.
With this knowledge, we can implement some custom JavaScript to calculate the category totals. To accomplish that, we will jump into Tealium IQ and add a JavaScript Code extension.
Let’s jump into the code!
Let’s define our variables. We will need to grab some values from the Data Layer. With the JavaScript Code extension, we are supplied with a way to do this with parameters: b. B is a reference to utag_data. With this, we can grab and set the price and sku arrays. We will also set the category totals which we will initially set to 0.
let product_prices = b.product_price,
    product_skus = b.product_sku,
    category1_total = 0,
    category2_total = 0
To calculate the category totals, we will loop through the products_prices and use the loop’s current index in order to grab the category from product_sku. Within the loop, we will determine the category by grabbing the first few letters of the sku using substr. If it matches, then we will add the price to the overall category total. For this example, we are only capturing two specific categories which are reflected in the code, but we could easily expand this logic to accommodate all categories on the site.
for(let i = 0; i < product_prices.length; i++){
   let sku = product_skus[i],
       price = parseInt(product_prices[i])

   if(sku.substr(0, 4) === 'cat1'){
      category1_total = category1_total + price
   } else if (sku.substr(0, 4) === 'cat2') {
      category2_total = category2_total + price
   }
}
Once the loop is complete, we will push these category totals into the Data Layer using that parameter b.
b.category1_total = category1_total
b.category2_total = category2_total
Before we can see this data in the console, we need to make sure we approve the environments for publishing within the extension. Select the desired environments, Prod, QA and Dev are all available, using the “Approve for publish” button. In this instance, we’ve opted for all environments. Please note this is a necessary step as you will not see these changes even if you opt for the save environments when pushing your overall IQ changes.
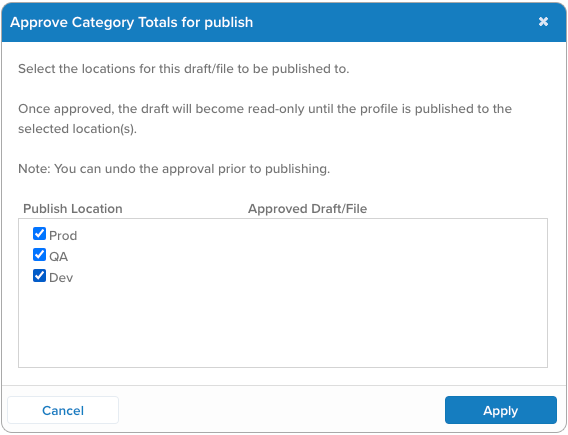
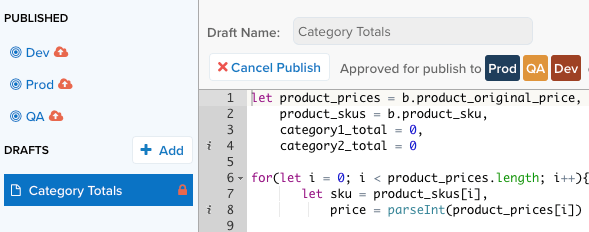
You will need to select these environments for every change you make to your code within the extension. With this in place, we can publish our IQ changes.
Checking Changes on the Site
Using Web Companion
Once that is complete, we can navigate to our website and use Web Companion within the Tealium Tools browser extension to show us those new changes. Within Web Companion, we will want to do several things. Switch the Target Environment to the desired environment and click the “Refresh Page” button. This will ensure we are seeing the latest changes.
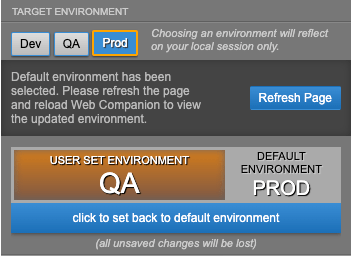
Once that’s complete, we will want to make sure our extension is in place. It should show up under the Extension tab like the following.
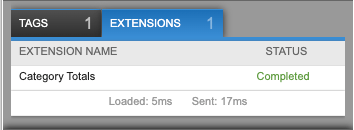
If you do not see that, then you need to double-check if you are in the right environment or if your latest changes were pushed.
Jumping into the Console
To test our logic, we will add several items from the two categories we are targeting to our shopping cart and checkout. Below is the content of our cart. If our logic is correct, we should see the sum of Item 1 and Item 4 along with the sum of Item 2 and Item 3.
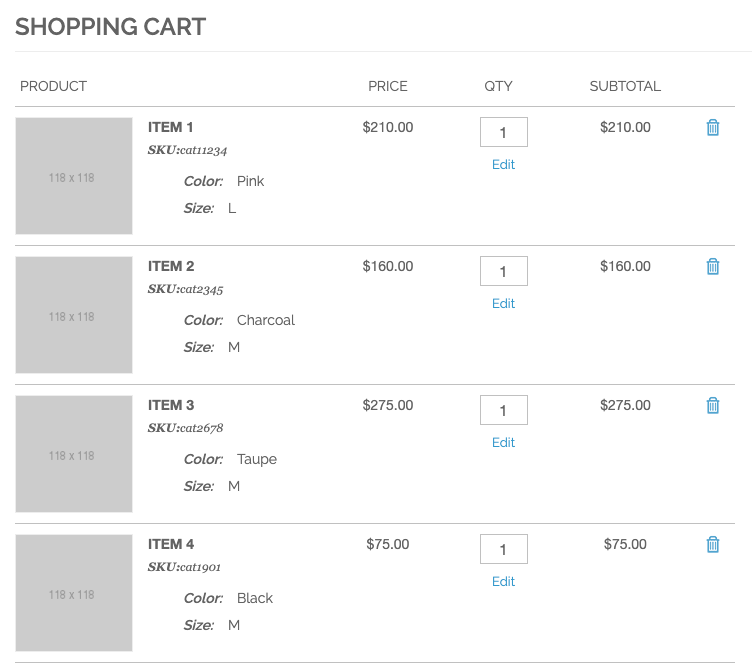
Once again, typing
utag_datainto our console will reveal all the data on the page but now with our two category totals. We can see that our logic worked! Now that we have these totals in place, we need to attribute them to our user and make actions based on these totals. This carries us into the Event Stream and Audience Stream portions of Tealium.

Jumping into EventStream and AudienceStream
We have now done all the heavy lifting in iQ. All that is left to do is configure attributes on the server-side. Within EventStream, we will create two event attributes for each category. We will select the attribute type of Universal Variable with the data type Number.
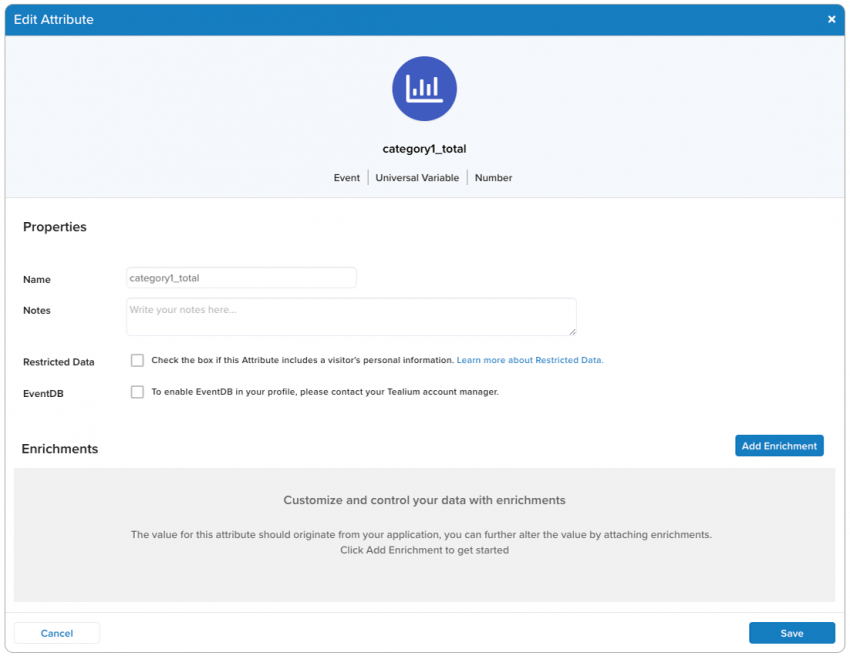
Once that is set, we can move into AudienceStream. We will set the attribute scope to Visitor since we are calculating lifetime values. As with EventStream, we will select the data type Number.
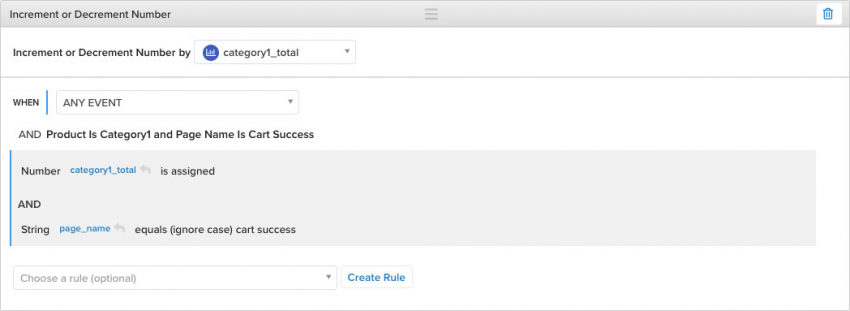
Once this is set, we will add the enrichment ‘Increment or Decrement Number’ using the event attributes we created as we will want to continuously update this value as the user comes back to the site and make future purchases.

We will leave “Any Event” for the WHEN field. Since we only want to capture the category purchase totals, we will create a rule that this should only happen when the
page_nameequals (ignore case) “cart success”.
The Possibilities
With everything in place, you can now create custom audiences in the Tealium CDP based on these lifetime category purchase totals attributes. With these audiences, you could include serve specific ads based on the customer’s category affinity or email the customer an enticing offer for those category products they have purchased the most. Leveraging Tealium allows you to amplify your marketing efforts where you can accomplish so much within a single platform.
